While whipped cream is an excellent addition to almost any dessert, if you want to take your dessert game a step further, then you have to try marshmallow whipped cream!
Marshmallow whipped cream not only adds a tasty flavor to the whipped cream but also helps the cream to become more stable and ensures that it will keep its shape for a longer amount of time.
You may think that making this kind of whipped cream (or any whipped cream for that matter!) is too hard or too much effort to do, this recipe will show you just how easy it is!
This marshmallow recipe whipped cream calls for just two basic ingredients, and the result is a serving of frosting that is airy, fluffy, and light as a feather.
Marshmallow whipped cream is the perfect frosting for making ahead of time due to its exceptionally stable structure, which enables it to keep its whipped texture for up to 48 hours without losing its volume or becoming watery.
This also makes it the ideal frosting for using as a filling or topping for cakes, cupcakes, and other baked goods.
Deliciously irresistible, with ideal pairings including cupcakes, pancakes, pudding cookies, as well as hot and cold beverages, this whipped cream can be used in basically any dessert, and will take your sweet treats to the next level.
Find out how to make this simple marshmallow whipped cream below!
A Quick And Easy Marshmallow Whipped Cream Recipe
Equipment Needed
It’s impossible to overstate how easy it is to make marshmallow whipped cream. You don’t need to have a highly developed baking station or be highly skilled in baking to make this recipe.
You will need a few basic pieces of equipment though. But don’t worry! You will probably have all of these in your kitchen already, as they are kitchen staples.
Here is what you need:
A mixer, either electric or on a stand, to combine the ingredients.
If you don’t have any type of mixer, you may use a balloon whisk instead. When compared to using an electric mixer or a stand mixer to whip the cream, using a balloon mixer will take a bit longer to get the mixture to the right consistency. It may also take a bit more effort on your part.
A large bowl that is ideally made of metal or glass rather than plastic because these materials are superior to plastic when it comes to maintaining cold temperatures.
Be sure that the bowl you use is big enough to hold the whipped cream once it has been beaten up properly. When you whisk the cream, it will increase in volume by more than two times its original size.
A scale, or measuring cups and spoons if you don’t have this.
Ingredients
This recipe calls for just two ingredients, making it super easy to make and prepare!
You will need:
Whipping cream/heavy whipping cream (250ml/1 cup) – You have the option of using either regular whipping cream or heavy whipping cream while preparing this dish. N matter what cream you use, you have to make sure that it is cold before you start making this recipe. Put it in the fridge a few hours before you want to start making this dish, or leave it in there overnight if possible.
Marshmellow fluff/marshmallow crème (18g/3 tablespoons) – This is a fluffy, creamy spread with a flavor and consistency comparable to that of marshmallows but that comes in a semi-liquid condition. It combines well with whipped cream to form a frosting that is light but secure despite its airy texture, and it is very sweet and delicious.
The Method
Here are the simple steps to making this recipe. How you make it will depend on how soft/stiff you want the mixture to be, but we will explain that further down.
Put the bowl in the refrigerator for approximately ten minutes before use.
Add whatever cream you are using into the bowl. Then, put your marshmallow crème or fluff on top of this.
Before you start beating, make sure that your stand mixer or electric mixer is on the slowest speed it can go by setting the dial to the lowest possible setting.
Keep beating the cream until it reaches the desired degree of consistency, increasing the speed of the mixer to the medium setting as soon as it seems that the cream is beginning to thicken.
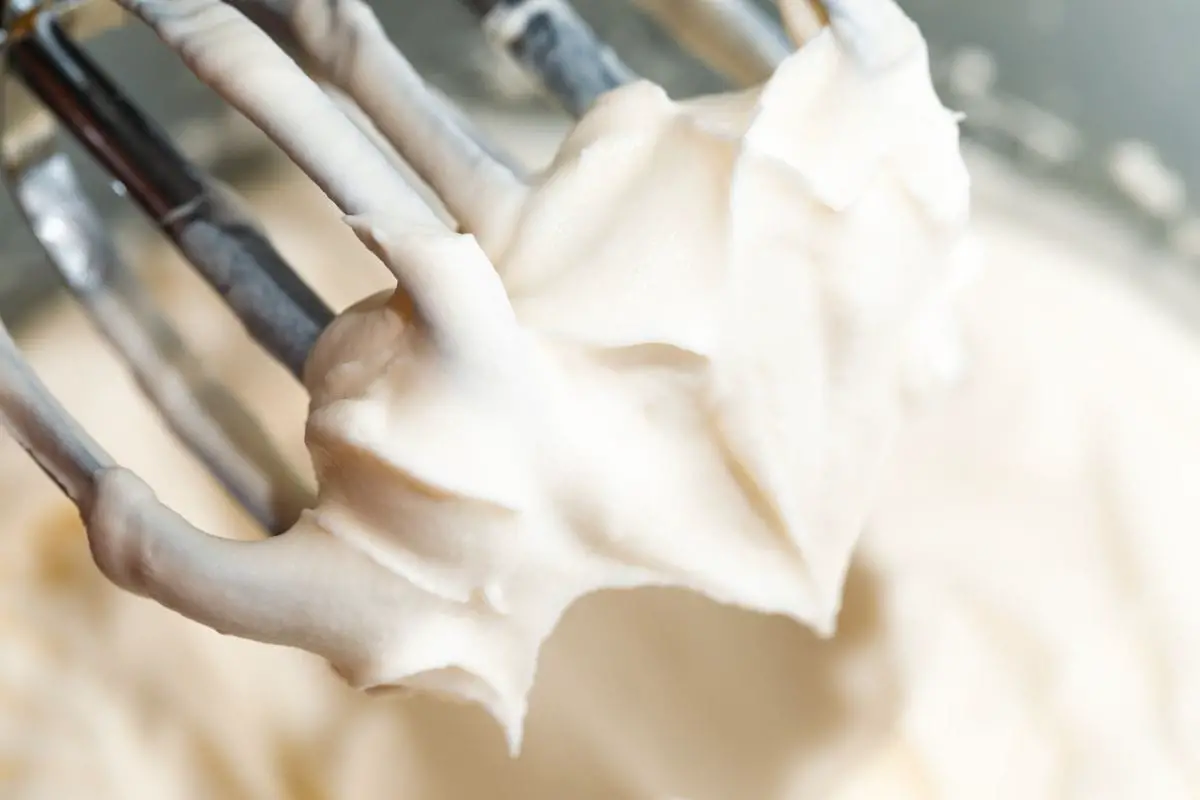
For soft peaks – To get soft peaks beat the mixture on medium speed for approximately three minutes. The cream must have a consistency that will allow it to keep its shape as billowy delicate peaks even after being stirred. This consistency is great for scooping over desserts like pies, pudding, and coffee mousse. It is a fantastic choice for filling cakes and spreading it on top of cakes.
For stiff peaks – The whisk or beaters that are used to whip the cream to form firm peaks will leave distinct tracks or lines in the cream as they go through the mixture. For piping, stiff cream is an excellent choice. The whipped cream is better able to keep its shape.
When the cream reaches this consistency, you must stop beating it and let it sit for a moment. If you keep beating the cream after it has reached this stage, it will ultimately curdle and separate into liquid and solid components.
That is all it takes to make this recipe! After making marshmallow whipped cream, you must use it pretty quickly.
This is because when left at room temperature, the whipped cream can become watery or deflate quickly.
If you find that you have made too much and don’t want to waste any, then you can store it for 3 days in a refrigerator, so long as it’s in a sealed container.
After a few days, the cream will deflate, but giving it a quick whip before serving will give it its airy texture back.
Summary
Making marshmallow whipped cream is super easy to do, only requires 2 ingredients, and can be made in a matter of minutes.
Make this the next time you fancy a change from the typical whipped cream to use in your desserts.
Hi! I'm Kate and I have been baking and cooking for as long as I can remember. I like to share the most interesting tips and recipes I try here on What Kate Baked for you to enjoy. If you have a favorite recipe you'd like to share send it over on social.