Using up leftover cake after a birthday party or any kind of celebration can feel like a bit of a chore – no matter how much you eat, there always seems to be more!
Thankfully for you, we have written up this delicious recipe to teach you how to make delicious cake pops out of leftover cake.
These can be enjoyed right away, or they could be frozen for later, if you are feeling all caked-out. Read on to learn more!
How To Make Cake Pops Out Of Leftover Cake
Ingredients: All you need for this is your leftover cake – if it is covered in buttercream frosting or even jelly, you can mix that into the cake pop mixture, but we recommend that you remove any hard icing – such as a hard chocolate, marzipan, or royal icing, as this will change the texture of the cake pop, and can make it lumpy and difficult to shape.
Step One: Fit your electric mixer or handheld electric whisk with a paddle attachment, and beat your leftover cake on a medium intensity until all components of the cake (cake and frosting) are combined well.
It should have a paste-like consistency, that is a bit denser than cake, as you will have knocked the air out of the mix.
Step Two: Shape the cake pops by rolling the mixture into ball shapes (each ball should have two tablespoons worth of cake pop mix in it).
Pop these balls onto a baking tray that you have lined with baking parchment (glossy side facing up to avoid any sticking).
Step Three: Chill the tray of cake pops in the refrigerator for about an hour, so that they harden slightly, and can be manipulated without falling apart or changing shape.
Step Four: Once the pops have suitably hardened, you can decorate and coat them.
Alternatively, you can just pop them into a freezer safe plastic bag or container without coating them.
They will store well in the freezer for two months.
How To Coat Your Cake Pops With Melted Chocolate Or Candy
If you have ever had a cake pop from a coffee shop, you will know that the tasty candy coating and cute designs are two of the best parts of a cake pop.
You can forgo the candy coating – but we think it makes the desert. Here is how you candy coat the cake pop!
Step One: Ensure that the cake balls are chilled and hard, but not frozen.
If you are candy coating cake pops that you have kept stored in the freezer, then ensure that you have swapped them from the freezer to the fridge, so they can defrost.
Don’t defrost them on the countertop – as the sudden swap to room temperature can mean that all the layers of cake pop defrost at different rates.
The outer layer can be squidgy and soft, whilst the center is still frozen solid (which is less than ideal).
Step Two: Melt the candy counters (typically made out of chocolate – but we think you can find ones that are chocolate free too, if you prefer).
Place them in a shallow bowl, and melt them according to the directions on the package.
Step Three: Prepare a secondary baking sheet by lining it with waxed parchment paper.
Take your first baking sheet of cake balls out of the fridge, and use a piece of paper towel to pat moisture off of their surface, as condensation can develop in the fridge, especially if defrosting.
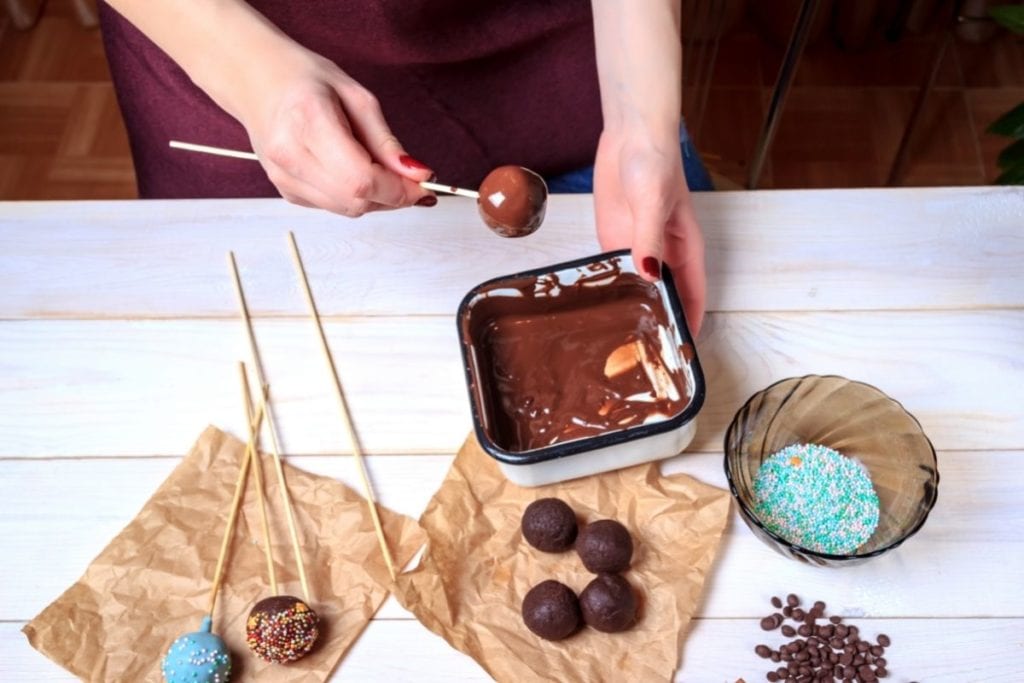
Step Four: Coat each of the balls one by one with the melted candy.
We suggest that you use a fork to really gently roll each cake pop ball through the melted chocolate.
Be really careful with the fork to avoid reshaping the balls.
There should be a good amount of coating between the cake pop and the fork so that the coating remains smooth and shiny in appearance.
Step Five: Remove the balls from the melted candy with a fork, and give it a gentle wiggle so that excess chocolate drips off.
Place the ball on your prepared parchment lined baking tray.
Step Six: If you have extra melted candy, you can take this and drizzle it over the top for a little extra creative flair.
Step Seven: You can cover the cake pops in sprinkles by sprinkling them over the balls whilst the chocolate is still wet.
If you want a really full look, you can even transfer them into a bowl full of sprinkles, and roll them about, to completely cover the balls in it.
Step Eight: Once all the cake balls have solidified and the coating has hardened completely, you can remove them from the parchment paper.
Snap off any extra chocolate that has pooled around them as they have dried.
If you want to turn them into true cake pops (rather than just cake balls) you can press a lollipop stick into the cake ball.
Be gentle with it to prevent the coating from cracking and flaking off.
Here’s A Few Favorite Cake Pop Toppings Of Ours
In case you needed a few ideas on how to decorate or flavor your cake pops, here are a few of our favorite combinations:
– Red velvet cake leftovers, with dark chocolate and chopped nuts.
– Birthday cake leftovers, with white chocolate and rainbow sprinkles.
– Vanilla cake leftovers, with crushed Oreos and milk chocolate.
– Vanilla cake leftovers, peanut butter drizzle and milk chocolate.
– Vanilla cake leftovers, white chocolate and freeze dried raspberries.
Final Thoughts
In conclusion, cake pops are a great way to use up any leftover cake, and help to prevent any household waste.
They also keep in the freezer for a few months, so you can defrost them whenever you fancy.
We hope that this article has helped to guide you through the process of making your own cake pop. Have fun baking!
Hi! I'm Kate and I have been baking and cooking for as long as I can remember. I like to share the most interesting tips and recipes I try here on What Kate Baked for you to enjoy. If you have a favorite recipe you'd like to share send it over on social.