Cake pops are one of those recipes that tends to go unappreciated when it comes to confectionaries.
It has the benefit of being a great way of enjoying cake, whilst also having the novelty of eating it like a traditional lollipop or popsicle.
Plus, it’s even a great way of avoiding getting your and your kid’s hands too messy, at least when eating them!
The only downside is that there seem to be a million methods out there, all with their techniques and ingredients.
So which method do you use? If you’re looking for a foolproof recipe and method, then this one is just right up your alley.
You’ll see why in just a minute.
A Quick Introduction To Cake Pops
So what exactly are cake pops anyway?
They’re typically made from cakes, frostings, and other goodies that you can find in any good confectionary shop.
Sometimes they have fruit such as strawberries or raspberries added into them, but I’ll talk about different ways of making them later on down the page.
How do you get these tasty delights into shape, though?
Well, many people will tend to either ice them up or roll them in sugar before popping them into the freezer.
Either option works fine, but I found that with my particular technique, I was able to achieve a much more crisp outer crust without needing to add any extra icing.
If you’ve ever tried to put a tray of cake balls into the freezer, you may know the struggle that comes along with doing so.
With this method, however, you don’t need to worry about anything falling apart because each pop is individually wrapped in an airtight container – meaning no rumbling cake or chipped corner!
This method also gives you the best control over the consistency of your final product.
For example, if you want some big fluffy cake pops (like for Easter), simply freeze them overnight.
However, one of the most popular ways of making a cake bake is with the use of a mold.
In the same way that people use molds to create intricate and delicate chocolate designs, or how you would use a quirky ice tray to create novelty ice cubes, molds are an excellent way of baking cake pops in a way that is perfectly shaped however you want it.
The Recipe For Mold-Made Cake Pops
We’ve found an excellent recipe that makes it incredibly simple and easy for anyone to make their cake pops, especially for people who already know a thing or two about baking big cakes and cupcakes.
Courtesy of inthekitchen.com, this might be one of the easiest confectionery recipes that you’ll find, which means it’s great for all the family to give a try.
Grab Your Ingredients
This is the part that will probably be the most hassle, seeing as there are a few items that may be a little difficult to get your hands on immediately.
Whilst many ingredients will be fairly easy to get a hold of, such as a vanilla cake mix, chocolate and sprinkles (maybe even some chocolate sprinkles), eggs, and vegetable oil, there might be a few that take a little longer to find.
A good cake pop mold might be a little tricky to get a hold of, as it is a somewhat niche type of cake batter mold.
However, it will mean that you’ll never go wrong with the results of your cake pops.
We recommend that you buy a set of three cake pop molds, as opposed to buying individual ones.
This is because it will allow you to practice your technique without having to waste too much money at once.
So, it may take a little time, money, or both to get your ingredients and gear together.
But that just means that, with this being the toughest part, everything else should be, pardon the pun, a cakewalk!
(As a note, make sure that your oven is turned up to 350 degrees Fahrenheit before starting to cook.
It will need to be already warm to cut out on baking time, as well as give your pops an even bake.)
Whisk It All Together
This step shouldn’t be too tricky, but it will require a little elbow grease on your part.
Now, you’re going to need to whisk or mix your batter ingredients, ensuring that everything is evenly combined.
To help ensure that everything goes smoothly, we suggest using a large bowl that gives you plenty of room for your arms to move, or getting an electric whisk to cut out the hard work.
Add Batter To Your Mold
Once you have a lovely smooth batter, and your cake pop mold has been lightly wiped with a little vegetable oil, it’s time to pour your batter out!
Remember to pour slowly, as this will stop any of the cake mixtures from overflowing over the sides of your mold.
You should also make sure that you leave enough room in your molds to allow the cake pops to rise a little, and not spill and get stuck on other molds.
Once you’ve poured your batter into your cake pop mold, then you can move on to the next step.
Time To Bake Your Mold
Place your mold or molds in the pre-heated oven, and leave them to bake for 20 minutes.
During the baking time, you can start to melt the chocolate until it is perfectly melted and very runny.
Make sure not to burn it! Once your 20 minutes are up, take the cake molds out, and leave them to cool for 4 to 5 minutes.
You don’t want to be handling burning hot batter, after all!
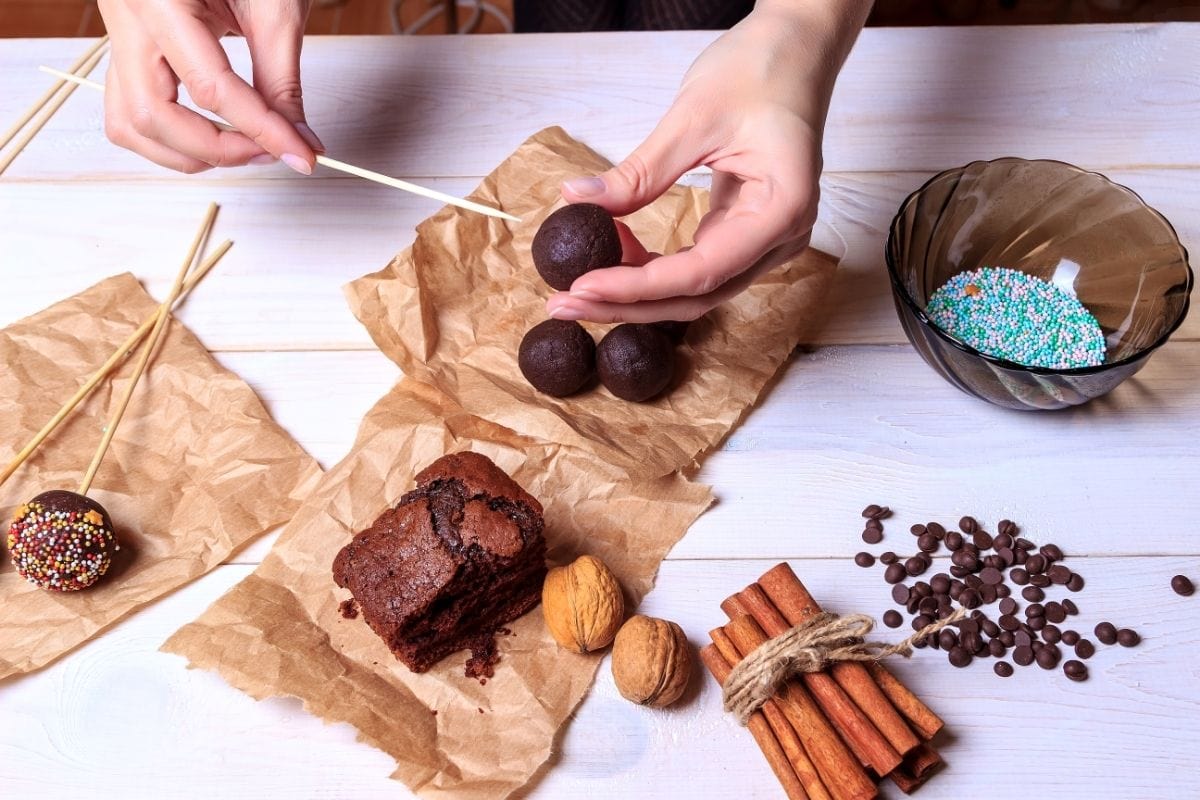
Stick Your Cake Pops Together!
This part may be a little tricky, but with a little patience and a steady hand, you’ll be done in no time.
Use the melted chocolate that you prepared earlier to stick the pieces of cake pop together, to make a lovely round popsicle-shaped sphere.
Give them a little time to set, as the pieces may slip apart if you don’t give the chocolate time to harden.
Once the cake pop sphere has been set, you’ll be ready to stick the popsicle stick into the cake, making the iconic shape.
Give your cake popsicles a little more time to set, and the stick should be nice and secure inside.
If you are desperate for these tasty treats, this is a perfect stopping point.
But if you want to make them extra tasty, then you’ll want to pay attention to the next and final step!
Time To Decorate!
This is where you get to go crazy with your toppings.
Dip the cake pops into the leftover melted chocolate, and let it stand for a few moments before taking it out.
With a head of gooey chocolate, you can add any sort of topping to the cake pop that you want.
Sprinkles. Dessert sauces, like strawberry or raspberry. It’s all up to you here.
Whether they’re for kids or adults, you can always make something special by adding decorations to your creation.
And that’s it! Enjoy this delicious treat you made yourself!
Conclusion
Congratulations!
You have a new dessert or sweet treat under your belt! If you enjoyed this tutorial, please share it with your friends and family!