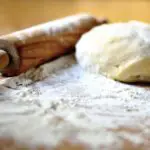
There is nothing worse than your dough not rising, but there are solutions to this. Dough will rise when there is yeast mixture involved, as this reacts with the ingredients.
The dough rises because the yeast will interact with the sugars that are present in flour. The yeast feeds on the sugars present in mixtures, releasing carbon dioxide into the mixture, and making it rise.
This is necessary for baking a loaf of bread, and other kinds of dough such as cinnamon rolls. In this article, we will be finding out what happens if you bake dough that has not risen, and how to solve this issue. Let’s get started!
What May Stop Dough From Rising?
There is nothing more annoying than having a bread dough that didn’t rise properly. Baking bread is an intricate and complicated process, and it requires some specific ingredients each time.
You will always need flour, warm water, and yeast mixture. Dead yeast will not rise, so this is one of the best ways to tell if your yeast has expired. Other common ingredients in bread dough tend to be salt, butter, eggs, and sugar.
This depends on if you are making sweet bread dough. Sweet bread dough takes longer to rise properly, so this is a factor, too. But, every time you are making a dough that is required to rise, you will always need warm water, flour, and yeast.
Yeast
The yeast is the first thing to check if you can see that your bread has not risen. Check the type of yeast, and the expiration date on it. This will help you determine if it is the yeast that is the issue.
Yeast that has not been opened will last two years, but opened yeast will last less time; probably around six months. If your yeast is old, it may not function as well. Flavorful bread requires active dry yeast that is in date, or fresh yeast, instead.
Also, keep in mind that if you are making sourdough, it is likely it will need even longer to rise, so this could be a reason, too.
Environment
The environment in which your yeast is rising is super important, too. If the environment is not right, do not expect the dough to rise.
The optimal environment for bread rising and bread baking is approximately 75F, as this is humid enough for the yeast mixture to release carbon dioxide, and let the dough rise. If the temperature is cooler than this, it is likely that the yeast will not react.
Flour
As we know, flour is equally significant as yeast when you are baking bread. To bake bread, you always require flour, and this is essential.
Check the type of flour type, and think about how you are kneading the dough. For example, bread dough made with cake flour or all-purpose flour will not work well.
The dough will collapse, and it will not rise properly. You can try to prevent your dough from collapsing by kneading, and it should form a stiff ball.
If you have too much water present in your dough, it will also not rise. For a successful and airy texture in the bread dough, you should try to use unbleached bread flour.
Salt
Salt is another factor to bread, but you should not add too much salt. Salt is necessary for developing gluten proteins that make a smooth and even dough. If you are making a sweet dough, even sweet bread dough needs a small amount of salt in order to rise properly.
Resting
The whole resting process will also affect if your dough is going to rise. Bread rises gradually, but certain types of dough needs longer.
With the addition of things such as baking powder, baking soda, and eggs will alter the amount of time it may take. A lot of dough requires at least an hour to rise, but preferably more than two.
How To Fix Dough That Didn’t Rise
Now, you may be shocked to find out that it is possible to fix dough that didn’t rise. Fixing dough is a process, and you need to make sure that you did everything right beforehand, from how much flour you used, to whether or not you used a bread machine or stand mixer.
Temperature
The first thing to try is increasing the temperature where your dough is rising. The right temperature is super important, and yeast loves a warm and moist environment. This is true for instant yeast, active dry yeast, and fresh yeast.
Yeast is what helps make bread fluffy, and it helps create more flavorful, perfect finished loaf. Put your dough in a warm place. A warm place allows the dough to rise.
To create a warm place, you could put your dough in a bowl in the oven, and fill a pan with boiling water, placing it alongside. This will not kill the yeast, but will develop gluten in the dough.
More Yeast
If you are in doubt, you could try adding more yeast. Open some new yeast, and mix with warm water, and a small tablespoon of sugar. Let the yeast mixture bloom for a few minutes, and add to the dough. So much sugar, and the yeast cells will not be able to ferment.
Flour
To form air bubbles, you need yeast to react with flour. Air bubbles are formed from carbon dioxide, and more flour will help this if you add it at the end. A dough hook will incorporate the ingredients. For fluffy loaves, you require more flour.
If the dough is too sticky before it proves, add more flour, as this is probably under-kneaded. Make sure it no longer sticks to your hand.
Proofing Bowl
The proofing process is important. Knead your dough properly, and wrap a metal or smooth bowl in plastic wrap.
The plastic wrap will stop anything getting in, and allowing the yeast to ferment on its own. Let the dough rise, preferably for more than an hour or two. Bread doughs require a lot of maintenance, and it does not matter if you use active dry yeast, or whole grain flour, they need just as much care.
Do not put your dough in the refrigerator overnight, as this is not what yeast cells require. To rise overnight, simply place it in a warm place, or in the oven with the oven door open and the light on.
Final Thoughts
Bread dough and dough is a difficult thing to get right. Dead yeast is a common reason for flat dough, as well as too much flour and not enough dry yeast.
Let bread rise for hours in order to get a good rise, and if you do not, follow the tips above. Thank you for reading!


