You can be the best baker in all the world; the fact of the matter is that whatever you bake and whatever exciting new recipe you’re using – in the end it all comes down to the preparation.
This is especially true when it comes to cake.
What’s the point of planning a towering currant-rich, cream-laden, cocoa powder extravaganza if as soon as you try and remove it from the cake pan after cooking, it won’t come out?
You may be forced to stick in a knife around the edges of your cake pan and watch in horror as the whole thing crumbles out in ruined, but otherwise perfectly-fine tasting, bits.
Don’t be full of regret. Proper preparation makes the baker, and we won’t let you ruin your perfect cake.
This can’t be sorted with just a nonstick pan.
Learning to grease baking pans is one of the most fundamental parts of cake-baking, but if you’re new to this art and you want to make sure that you know how to grease and flour a pan properly, then look no further than the instructions below:
What You Need
- Cake pan/baking pan/bundt pan (choose the correct size according to your recipe)
- Salted or unsalted butter, margarine or cooking spray/nonstick baking or cooking spray/vegetable oil
- All-purpose flour/Instant Flour
- Greaseproof paper/parchment paper
- Paper towel
How To Grease And Flour A Pan
1. Prepare To Prepare
If you haven’t already, clear and clear a large surface for preparing your cake mixture.
Once it has been prepared, clean a cake pan and make sure it is completely dry before proceeding.
Have your chosen greaser readily available for the next stage.
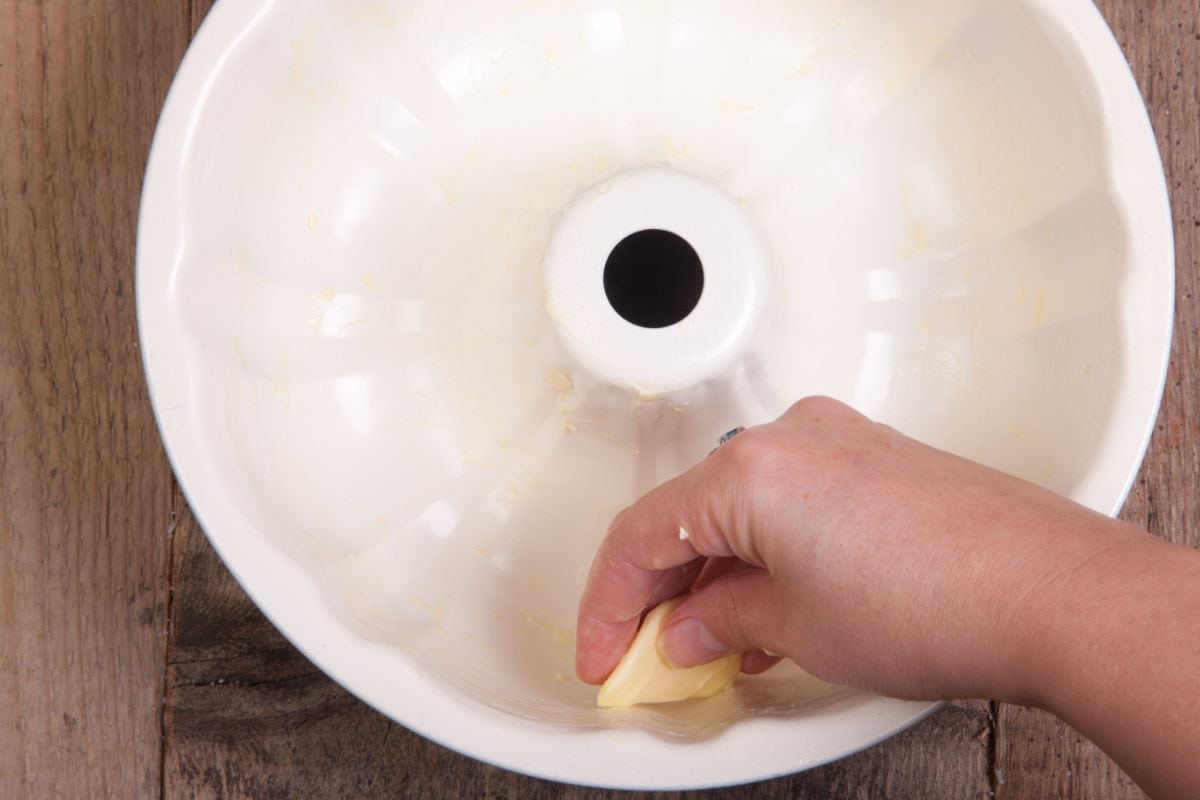
2. Grease Pans For Baking
If you are using butter, similar spread or vegetable oil, apply a liberal amount to a paper towel (or a spare piece of the greaseproof/parchment paper) and smear it across the bottom and sides of the cake pan, until every millimeter of the inside of the cake pan is thoroughly coated with a thin layer of grease.
If you are using a nonstick cooking spray, the same principle applies.
A full coating will minimize the chances of an unfortunate sticking situation.
Note On Greasing Pans, Vegetable Oil And Nonstick Cooking Spray
If you are using a nonstick spray, non-specific cooking sprays or more specific nonstick baking spray, make sure it is a brand where you know the flavor won’t impact your recipe.
There are many greasers and just as many methods of greasing.
A professional baker or pastry chef may even use a specialized melted butter, expensive cooking spray, vegetable oil or vegetable shortening for that perfect result, and then use a pastry brush to apply it.
For this reason, we don’t recommend using olive oil.
3. Adding The Flour
After you are sure that the pan has been fully greased, dump a very small amount of flour (about a teaspoon) into the bottom of the cake pan.
Not too much! We don’t want to affect the delicate flavor of your cake recipe.
4. Flouring The Bottom Of The Cake Pan
Holding the cake pan over the counter, gently tilt and shake your cake pan from side-to side until there is a thin layer of flour across the bottom.
Do so until all of the flour has been evenly distributed.
Don’t worry if there appears to be excess flour; this is required for the next step.
5. Flouring The Sides Of The Cake Pan
Carefully tilt the pan upon its side, and much as you would a tambourine, lightly pat the cake pan so that the excess flour runs from the bottom of the pan to the sides.
Be careful not to let the flour spill out and make a mess! You may want to do this step over the sink just in case.
Repeat with each side of the cake pan, turning it until all sides have been covered. Rinse any dropped wet flour away immediately so that it doesn’t have time to set.
Using Multiple Cake Pans
Alternatively, if you are going to be using two separate pans (if you are making a layer cake) and you have already greased the other pan as per the steps above, then you can simply do this step over the other pan and allow the excess flour to fall into that.
You may need to add a little more flour to this second baking pan afterwards to achieve the same thin layer of coating.
6. Lining The Pan With Parchment Paper
Some recipes do not call for you to line your cake pans with parchment paper and you may feel that greasing your baking pans is enough, but in our experience it is better to be safe than sorry- especially if you are trying out a new or complicated cake recipe.
For pan lining, you simply place a piece of greaseproof paper or parchment paper over the bottom.
What complicates this is if your cooking pan is a difficult shape- such as a traditional circular cake pan, loaf pan or a bundt pan.
Stretch your roll of parchment paper or greaseproof paper under the greased pan, and cut around it cleanly with a pair of scissors so that it is the perfect size to insert into whatever kind of baking pan you are using.
You now need to evenly coat this parchment paper lining with grease and flour too, as per the steps above.
7. Adding The Batter
You are now free to add your batter.
If the recipe calls for multiple pans as per a layer cake, then make sure that you distribute the batter evenly between your cake pans.
If any batter touches the rim, wipe it clear with a paper towel.
Once the cake has finished baking, allow time for it to cool before you attempt to remove them from the pan.
This time will depend on the nature of your recipe or the nature of your baked goods.
If all has gone correctly, by the time that you remove your cake from the pan, it should come away without too much hassle thanks to your efforts to grease and flour beforehand.
Remove the lining from your baked goods before decorating/icing, and serving.